CloudDB Chat App
What You're Building
This app is a simple app that uses the CloudDB component to store data in the cloud, and allows multiple users of the app to communicate over multiple devices.
Go to ai2.appinventor.mit.edu and start a new project.
In the Designer, add the following components:
| Drawer | Component | Name | Property | Setting |
|---|---|---|---|---|
| User Interface | Label | Label1 | Text | “Enter your name to join the chat” |
| Layout | HorizontalArrangement | HorizontalArrangement1 | Width AlignHorizontal |
“Fill Parent” “Center: 3” |
| User Interface | TextBox | TextBox1 | ||
| User Interface | Button | SubmitButton | Text | “Submit” |
| User Interface | ListView | ListView1 | BackgroundColor TextColor |
“White” “Black” |
| Storage | CloudDB | CloudDB1 |
Change the AlignHorizontal property for Screen1 to “Center: 3”, and the Title to “CloudDB Chat”
Your Viewer to look similar to the image below.

Initalize three variables, as follows:
- userName: stored when user logs in
- joined: boolean that is true once user logs in
- chatList: stores all chat messages in a list

When the user presses the Submit button, they are either entering their name to join the chat, or actually typing in a chat message. You'll check first whether they already joined the chat or not.
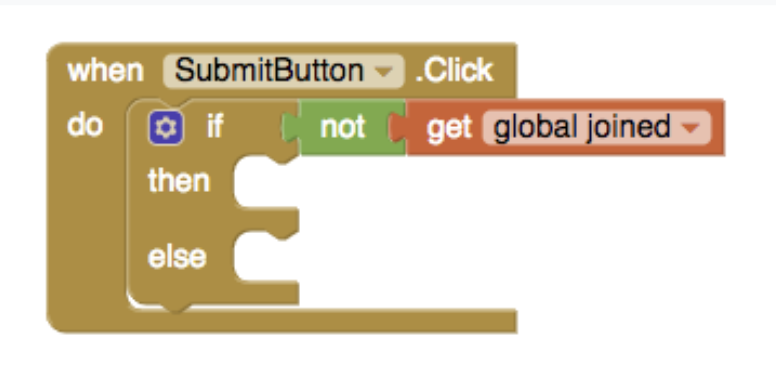
Drag out a SubmitButton.Click event block, and add an if-then-else block to it. Attach to the if slot, a not block and a get joined block. This says if the user has not yet joined the chat ...

Inside the then part of the if block, add another if-then block to ensure that the user has actually typed something into the TextBox for a username. If the TextBox is not empty, then set the userName, set joined to true, and display an appropriate message in Label1.

For the else part of the if-then-else block, you will add the code for when the user is typing in a chat message. In this case, you want to add the message to the list of messages already saved.
You will be saving those messages to CloudDB, the "Cloud Database". You will append the new message to the chat list already stored in CloudDB.
For a tag, simply use "chat", and join the userName, a colon, and the message so it will appear that way when displayed.
And finally, for either situation, clear the TextBox.

When the app first starts, you need to check if there are already chat message other users may have sent, and you need to display them.
Add a Screen1.Initialize block, and in it, call CloudDB1.GetValue to get any existing chat messages from CloudDB. If no value is found, return an empty list, since your chat messages are kept in a list.

When you call CloudDB1.GetValue, it asks CloudDB for that tag’s current value. So there is a callback event, CloudDB1.GotValue, that is triggered when CloudDB responds to GetValue.
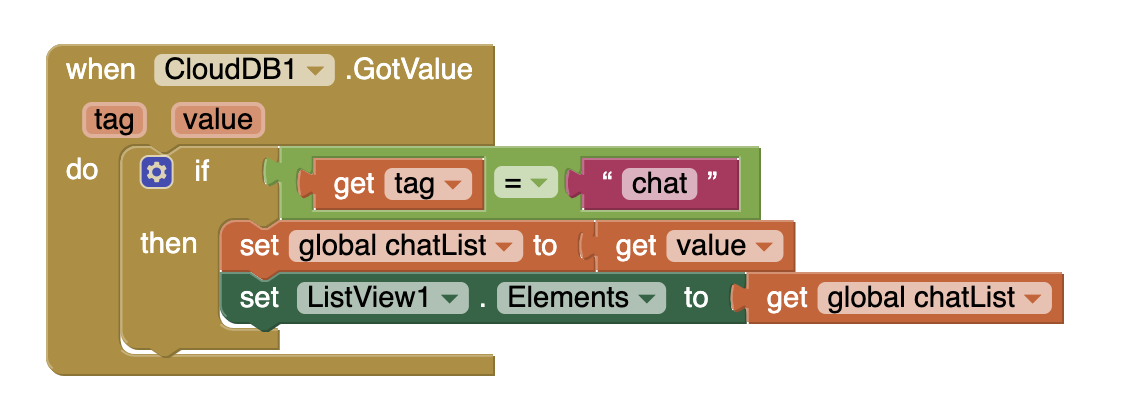
First check whether the tag is the correct one ("chat") using an if-then block. If so, then save the value, which should be the list of messages, into the global variable chatList.. Then set ListView1.Elements to the list of messages, so they will be displayed in the ListView.

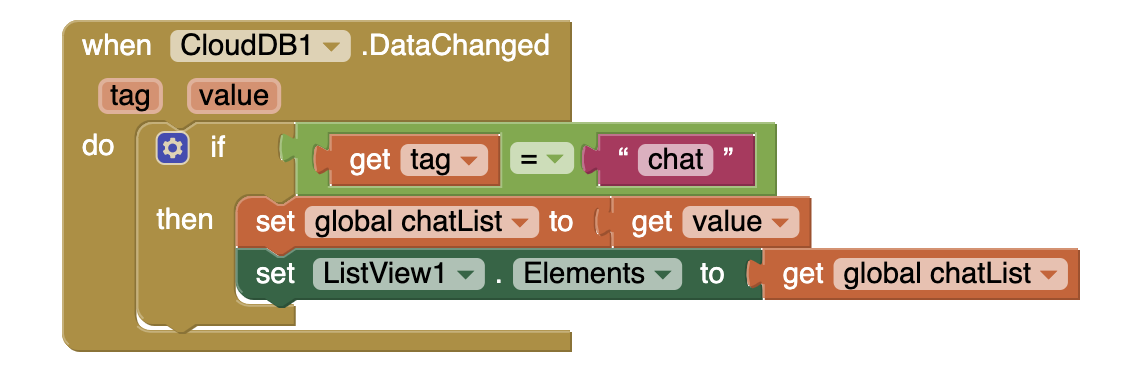
The CloudDB1.DataChanged event is triggered whenever anyone using the app updates CloudDB, so this event is triggered whenever any new message by anyone is sent. This block should essentially do the same thing as the GotValue block, so you can right-click and Duplicate then inner blocks from GotValue, and snap them into DataChanged.

That is it! Now it's time to test!
The best way to test an app using CloudDB and multiple users, is to use multiple devices. The MIT AI2 Companion does not always allow for mutiple users to connect at the same time, so the better option is to build the apk, and install your app on more than one mobile device.
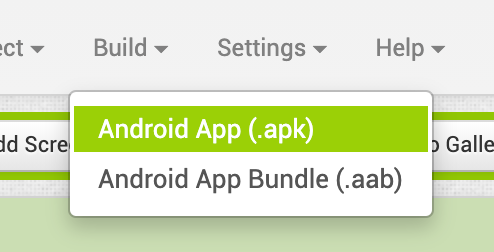
From the Build menu, choose "Android App (.apk)". Once the apk is built, scan the generated QR code, and install the apk on multiple devices. Then send a message from each device. All messages should appear on all devices.

You can also close the app, and restart it, and you should see the history of messages.
How cool is that?
Expand your App
Here are some ideas to enhance your Chat app!
- Reverse the order of the chat messages displayed so that the latest message is always displayed at the top. Hint: use reverse list block
- Indicate when a person has joined the chat such as “Selim has joined the Chat” in case they decide not to send any messages for a while.
- Add a time stamp to each message.
- Add a Clear button to clear out previous messages.
- Add chat rooms, where users must specify a room they want to join.
What other ideas do you have?


